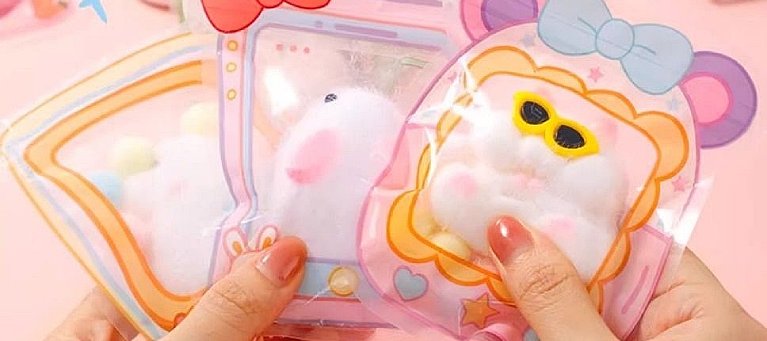
Learn how to make a custom Taba Squishy using silicone molds with this easy, step-by-step guide. Perfect for stress relief, DIY gifts, or a fun crafting project.
If you’re interested in creating your very own Taba Squishy or looking for a satisfying, long-lasting squish, this tutorial will guide you through the entire process—from selecting the right silicone mold to adding fun decorations. Whether you’re new to crafting or an experienced squishy enthusiast, these steps will help you make a perfect, custom-made squishy.
Materials Needed to Make a Taba Squishy
• Silicone mold: Choose from animal shapes, food items, or other fun designs.
• Liquid squishy silicone: This expands and solidifies into a soft, squeezable material.
• Mixing cups and sticks: For combining the silicone or foam.
• Acrylic or fabric paint (optional): For adding color and details to the squishy.
• Flocking powder (optional): To give your squishy a fuzzy texture.
• Glue (optional): For attaching additional features or securing flocking.
• Clear sealer spray (optional): To protect your paint and flocking.
Step-by-Step Instructions for Making a Taba Squishy with Silicone Molds
Step 1: Choose Your Silicone Mold
Selecting a silicone mold that fits your desired design. Silicone molds are available in various shapes, such as animals, food items, or geometric patterns. You can purchase pre-made molds online or make your own if you’re experienced with mold creation.
• Pro Tip: Ensure the mold is flexible and easy to peel off after the squishy cured.
Step 2: Prepare the Squishy Material
Mix your liquid silicone in a cup according to the manufacturer’s instructions. Most squishy materials require combining two parts (A and B) for the squishy to expand properly. Stir thoroughly to ensure a smooth mixture.
• Keywords: DIY squishy, slow-rising foam, handmade Taba squishy.
Step 3: Pour the Mixture into the Mold
Carefully pour the prepared squishy silicone mixture into your silicone mold. Make sure the mold is filled evenly and tap the mold gently on a flat surface to release any air bubbles that may be trapped inside. To make sure less air bubble, I usually apply vaseline to the mold to reduce the formation of air bubbles of silicone on the mold, it works great for me, but I have to wash off the vaseline after demolding.
• Keywords: how to make squishy, squishy mold tutorial.
Step 4: Let the Squishy Cure/Set
Allow the silicone to expand and set. Depending on the material, this can take several hours or overnight. Be patient during this stage, as the squishy needs time to solidify properly. Some silicone needs like 3-4 hours to cure while some needs like 50-60 minutes, it's depends on the formula of the silicone.
Another point you may wanna know is, silicone often cures faster in high temperature environment (for example summer time) than low temperature.
• Pro Tip: Check the manufacturer’s recommendations for curing time and conditions.
Step 5: Remove the Squishy from the Mold
Once the squishy is fully cured and hardened, gently peel the silicone mold away from the squishy. Silicone molds are flexible, making this process easier and reducing the risk of damaging the squishy.
How to Decorate Your Taba Squishy
Step 6: Paint the Squishy
After removing the squishy from the mold, it’s time to get creative with colors and details! Use acrylic or fabric paint to decorate your squishy. Apply thin, even coats and allow each layer to dry completely before adding more.
• Pro Tip: Use flexible paints that won’t crack when the squishy is squeezed.
Step 7: Apply Flocking (Optional)
If you want to add a soft, fuzzy texture to your squishy, apply flocking powder:
1. Apply a thin layer of glue to the surface of the squishy.
2. Sprinkle the flocking powder evenly onto the glued area.
3. Allow the glue to dry completely before handling your squishy.
Step 8: Seal the Squishy (Optional)
To protect the paint and flocking, you can spray the squishy with a clear sealer. This will add durability and help maintain the squishy’s colors and texture over time. Let the sealer dry thoroughly before using your squishy.
Create Your Own Taba Squishy
By following these easy steps, you can create a custom Taba Squishy that’s perfect for stress relief or as a fun, creative gift. Experiment with different shapes, colors, and textures to make your squishy unique.
Ready to try making your own handmade Taba Squishy? Gather your materials, pick a mold, and get creative! Don’t forget to share your creations on social media using #PinkPinkSquishy.


